For a project I was working on I wanted to use Select2 as a Gutenberg InpectorControl to allow me apply settings to a block. This tutorial will also give you the foundation you need for getting any third party React Component into the WordPress Gutenberg Editor.
Select2 is a super handy replacement for select boxes on your website. In particular it has some great options for selecting multiple items.
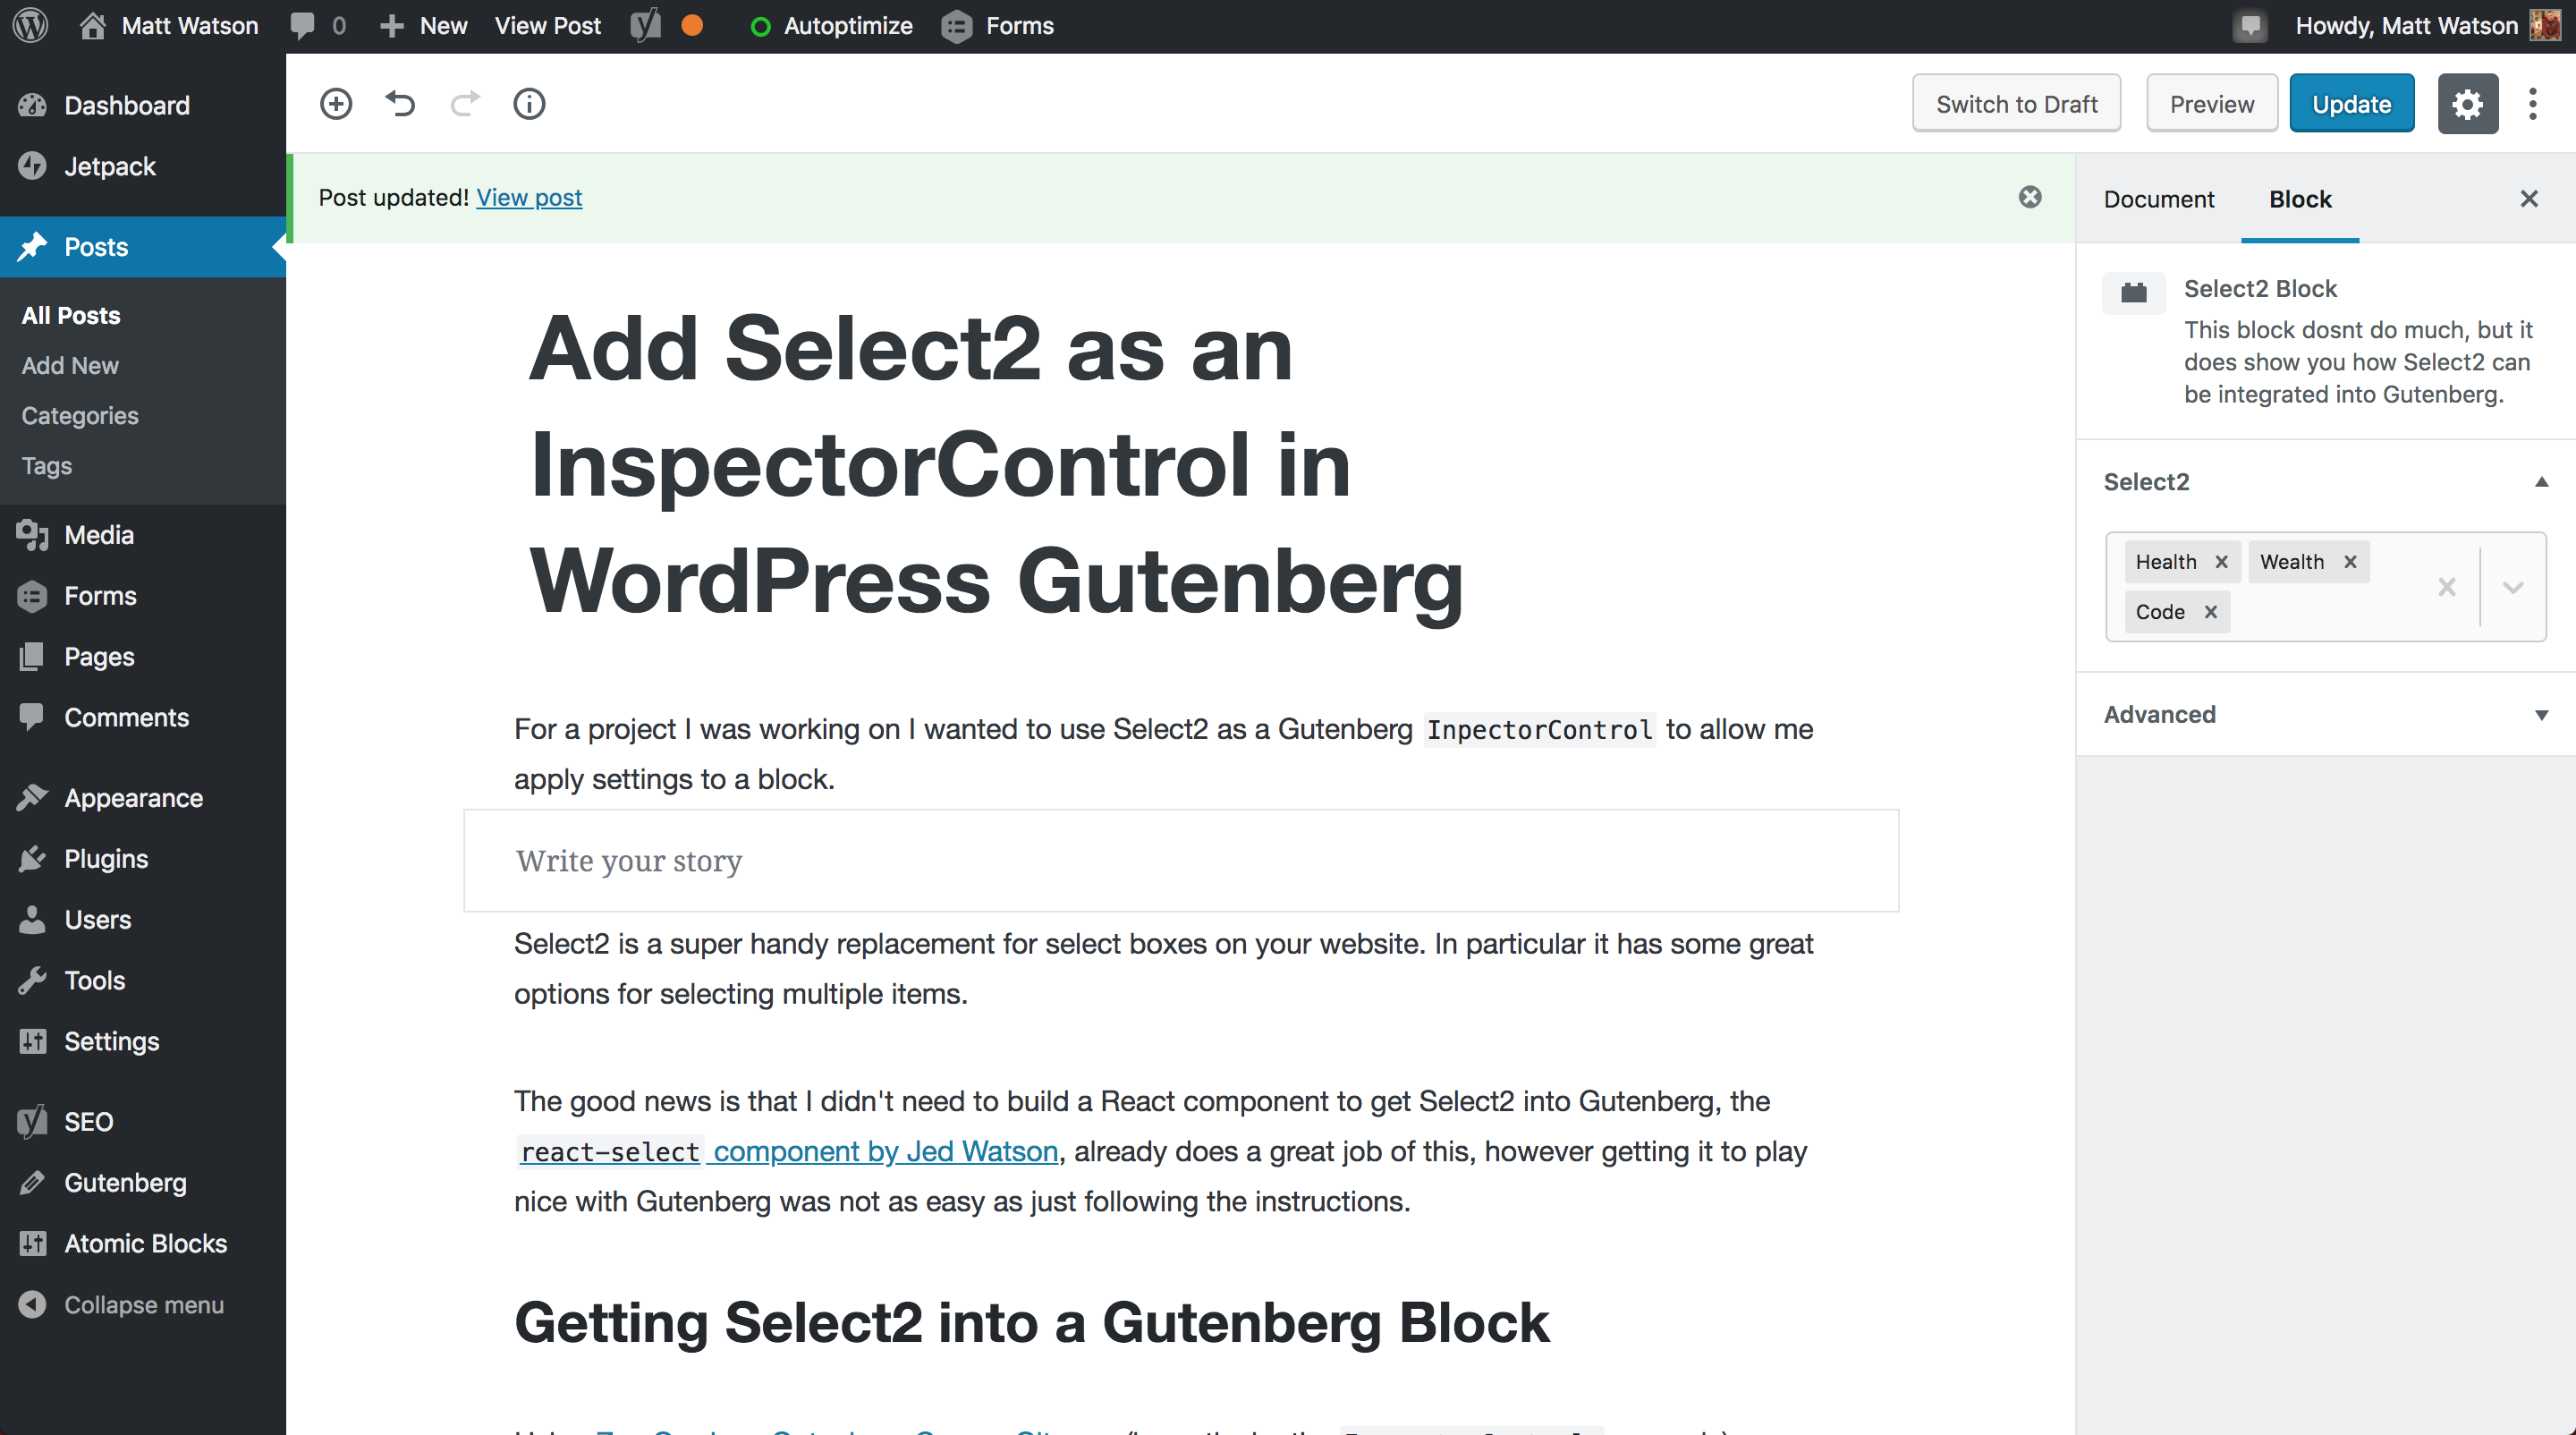
The finished product, Select2 in the WordPress Gutenberg InspectorControls
The good news is that I didn’t need to build a React component to get Select2 into Gutenberg, the react-select component by Jed Watson, already does a great job of this, however getting it to play nice with Gutenberg was not as easy as just following the instructions.
First things first, we needed to install the component into our build. As this was on npm it was as simple as entering the following into our terminal:
npm install react-select --saveGetting Select2 into a Gutenberg Block
Using Zac Gordons Gutenberg Course Git repo (part of Zac Gordons fantastic Gutenberg development course) as a base for my plugin (in particular the InspectorControls example), to use react-select I needed to add the following includes at the top of my file:
import React from 'react';
import Select from 'react-select';
Oh no! Compiling this gives us an error:
Module not found: Error: Can’t resolve ‘react’
Never fear, this great article on “How to use external React components in your Gutenberg blocks” by CSS Igniter came to the rescue, all we need to do is register externals in our webpack.config.js file:
externals: {
    'react': 'React',
    'react-dom': 'ReactDOM',
}
Like so:
module.exports = {
    entry: {
        './assets/js/editor' : './blocks/index.js',
        './assets/js/script' : './blocks/script.js',
    },
    output: {
        path: path.resolve( __dirname ),
        filename: '[name].js',
    },
    externals: {
        'react': 'React',
        'react-dom': 'ReactDOM',
    }
...
Registering the InspectorControls
Inside the panel roll of your <InspectorControls> component you will need to add the following:
<Select
    name='select-two'
    value={ JSON.parse( selectedOption ) }
    onChange={ handleSelectChange }
    options={[
        { value: 'health', label: 'Health' },
        { value: 'wealth', label: 'Wealth' },
        { value: 'code', label: 'Code' },
    ]}
    isMulti='true'
    />
We are not quite done, as we will also need to register the selectedOption attribute and handleSelectChange function. We can do this like so:
attributes: {
    selectedOption: {
        type: 'string',
        default: null,
    }
},
…and now for the function…
const handleSelectChange = ( selectedOption ) => setAttributes( { selectedOption: JSON.stringify( selectedOption ) } );Hang on, why do we need to JSON.stringify() and JSON.parse() the values? Well, because the value that the react-select component accepts is an array, and as Gutenberg wont let us save this value as an array, this is a workaround we can use.
Putting it Together
Our complete InspectorControls area should now look like so:
...
attributes: {
    selectedOption: {
        type: 'string',
        default: null,
    }
},
edit: props => {
    const { attributes: { selectedOption }, className, setAttributes } = props;
    const handleSelectChange = ( selectedOption ) => setAttributes( { selectedOption: JSON.stringify( selectedOption ) } );
    return [
        <InspectorControls>
            <PanelBody
                title={ __( 'Select2', 'text-domain' ) }
            >
                <PanelRow>
                    <Select
                        name='select-two'
                        value={ JSON.parse( selectedOption ) }
                        onChange={ handleSelectChange }
                        options={[
                            { value: 'health', label: 'Health' },
                            { value: 'wealth', label: 'Wealth' },
                            { value: 'code', label: 'Code' },
                        ]}
            isMulti='true'
                        />
                 </PanelRow>
             </PanelBody>
         </InspectorControls>,
...
Looking Good in Gutenberg
As you can see by the screenshot, it works pretty well:
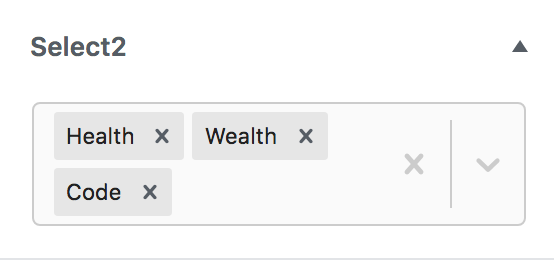
Select2 as a Gutenberg InspectorControl
Taking it Further
I used this Inspector Control in my Secure Blocks for Gutenberg plugin, find out how I populated the Select2 control with dynamic data from the WordPress REST API.